thegirlwiththecraftproblem

Just another WordPress.com site

Easter Peeps

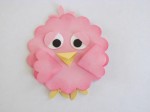
018This is a little Peep I made for friends for Easter.  It is Punch Art, of course.  There is a Dove chocolate between the two layers.  Pretty cute, don’t you think.

I hope everyone had a lovely Easter Sunday.  I know I did.  My son and daughter in law told us we are going to be Grandparents.  Pretty exciting.

Have a great week!

Leave a comment »

Cross Easter Card

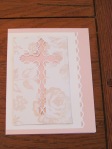
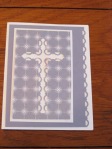
015 016As I promised LAST weekend, I am posting the Cross Card I CASE’d from Frenchie Stamps.  (She may be my new best friend.)

She made the cross using the Scallop Trim Corner punch and the Scallop Trim Border Punch.  Cut a piece of DSP 2 3/4 by 4 3/4 and fold in half.  Fold the top down 1 1/2 inches, this will be where you use the Corner punch.  Punch on the fold side.  Then open up (still folded in half) and punch with the Border Punch.  I cut mine a little larger then she said because I didn’t want it all of the way at the end of the paper.  I came back and trimmed a little off of it. Put a piece of card stock, cut the same size behind it.  She does a wonderful video and you shoul view that to get really good directions.  I think she is French and she has a really cool accent.

I believe this is a great Easter, First Communion or maybe even Sympathy Card.  I added the sentiment with a oval punch on the bottom right side.  At first I thought I would love the pink, blush a lot, but I actually think I like the other one better.

I hope you like the idea.  I just think it is beautiful and I had NEVER used the Scallop Trim Corner punch! That made me happy as well.  Happy Easter, everyone.

Leave a comment »

Monday Card

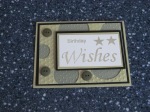
259  Hello.  Miss me.  I know.  I am back really soon.  Made this card over the weekend.  I CASE’d it from Stamp TV.  You know I love that place.

The card stock is all Stampin Up.  The base of the card is Sahara Sand, next layer (1/4 inch smaller) is black.  Next layer (again 1/4 inch smaller) is an old favorite – Mellow moss.  The layer with the circles is Shara Sand again.  The greeting is Sahara Sand, Black and White.  The greeting is stamped in Sahara Sand.  The stamp is from Gina K.  Stamp it Big.  (There is a similar SU greeting in the new catalog).

Now for the fun part.  Use your circular nestabilities and create multpile circles on the Sahara Sun card stock.  You may have to run it through twice because you want to use the same size cirles (I did.).  Now run the layer with the circles through your Cuttlebug or Big Shot using the largest dot folder you have.  Next run the Mellow Moss through the machine using the smaller Swiss Dot folder.  Adhere one on top of the other.  Adhere it all together.  Use dots to adhere the buttons to the card.  If you don’t have buttons, it’s okay.  It really did look pretty good without the buttons, but since they were sitting there waiting to be used, I used them!

I think this is a great card for either gender.  It would be nice in any color scheme as well.  I hope you can get a good view from the picture.  Try it.  You might like it!

Oh and on my last post, I have no idea how the Use It Tuesday Button ended up on the Facebook link.  It’s a mystery!

Have a great week.

Leave a comment »

New Craft

Hey everyone!  Again it’s been a while.  Sorry.  But today I am very excited about a new craft!  I think you can call it a craft because it involved essential oils.  Oh Yeah!  It’s not soap making though.  Sorry.  It could develop into soap making though.  (Just to keep you guessing)

Blizzard coming here to the Northeast, so must keep busy inside for the next day or so.  It is really starting to snow out now.  Hope all my friends and family get home safely.  While everyone else was going to the grocery store yesterday to stock up on milk, bread and beer, I went to Hobby Lobby for essential oils.  I know – pretty funny.  A lady at work told me about these Vicks disks you put in your shower to clear your nose and head when you have a cold.  It intrigued me.  (She does way different crafts then I do and is always finding things on Pininterest.  (I limit my time there because I could spend the entire day))  She found a site to make your own Vicks Thingys, as I am calling them.  Go the Frugal By Choice Blg or just google Vicks disks and you can find the recipe.

It involves baking soda, water and essentials oils, mainly eucalyptus, rosemary and lavender.  Use about 2 cups of baking soda, then enough water to make a paste.  Add ten drops of each of the oils, or like me just squeeze the bottle too much and stop when you think it’s enough.  Put them into muffin tins lined with wrappers.  The lady at work used ice cube trays, which would work just as well.  Now let them harden overnight.  (I found one recipe that baked them, but there is no way I was doing that. Oh and you have to add the oils after baking.  Important tip!)  Once hardened, put them in your shower, anywhere the water hits and enjoy the head rush!

Try em.  Tell me what you think.  They only take a minute to make.  I think you will like it.  Talk to you soon.

Leave a comment »

Happy Holidays!

How were your holidays!  She you have fun. Have you been wondering where I’ve been. I’ve been too lazy to post. I made lots of Christmas cards and even took pictures, but was too lazy to attach them. I also made an awesome gift, but I couldn’t get a good picture. Sorry. Let me tell you about it.

Several years ago on SCS I did a Secret Sister challenge. My SS sent me this beautiful gift. It is a plate and she made interchangeable card fronts to go into a plastic sleeve attached to the plate. It is a beautiful gift and you have to be really creative with the card fronts. I made two for gifts. There were different  holiday themes to them. I will try to get my daughter in law  to let me take pictures and  post later.

I promise to be a better blogger in the New Year.

Leave a comment »

Card Technique from Gina K

I did this card a while ago.  It was a technique from my friend, Gina K.lol  Everything on this card is from Gina K except the paper and that is Stampin Up Ivory.

The technique for the card is this.  Using one of the Big Shot Dies that creates an oval, whatever size you want it to be, cut out the oval.  Save the paper where you have the oval cut out, not the oval itself.  (Make sense?)  Now place that new template over your card stock.  Using a sponge, sponge ink around the side of the oval creating shading.  Remove your template, stamp the image and finish your card.  Viola!  A lovely card and very simple.  You can save your template to use on other cards.

I have been trying to take better pictures.  I read somewhere to use a light box.  I tried lighting my Martha Stewart board to see how it did.  It is okay.  I will try a real light box soon.  Anyone have any suggestions, I would really appreciate the help.

Enjoy your week!

Leave a comment »

Spotlight Technique

Sooooooooooo  I have been negligent in my challenges with my friends.  We had a challenge titled, interesting enough, Spotlight Technique. I, however, until a week ago totally forgot about it.  Then it took another week for me to actually come up wth the idea and make the card.

Do not even begin to ask me why I decided to use pastel colors in the fall.  I have no idea.  I tried to make myself go with more fall colors, but the old brain just did not want to.

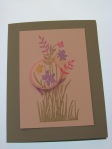
This is the first time I tried this technique and I liked it.  It wasn’t nearly as difficult as I first thought it was going to be.  The difficulty came from deciding which stamp set would work the best.  I decided to use Just Believe, which, believe it or not, had never seen ink.  I love the image.

The paper is Sage Shadow.  (Also went into my box of retired papers)  I inked the stamp with markers of various pastel colors.  For more information on exactly how to do this particular technique, I suggest you visit Splitcoast Stampers.  The tutorial is great. Someone told me Gina K had one as well, but I could not locate it.

Now for a paper story.  Tomorrow we are going to “tag” our Christmas tree at a local Christmas tree farm.  It beats trying to find a tree when it is blistering cold and there is snow on the ground.  The thing is you find your tree while the weather is warmer and mark it in some way so when you go back to cut it down you recognize it.  (They also keep a record of it back at the store.)  Each year I say I am going to do something to make the tree distinctive.  This year I decided I would go into my retired paper box and take out colors, cut them and stape a paper chain.  Well, when I opened the box it was like Christmas.  So many colors I loved and had not seen in such a long time.  I did not know which to choose.  I almost could not bear to cut them up to put on a stupid tree outside.  I mean use paper and actually get rid of it.  THE HORROR!  I choose some of the Bold Bright colors that I didn’t care all that much for (Yellow and that awful bright green), but nothing Christmasy.  Too bad it will still be recognizable and I can say I put some of that paper to good use.

Talk to you later.

1 Comment »

Wedding Bracelet

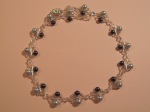
This is the bracelet I made to match the necklace and the dress.  It’s hard to see the blue.  It looks black in the picture, but trust me it all went together.  The pearls are the same ones used in the necklace.  Now I do not know if any of you are truly interested, but since I’m trying to provide more information I got the beads from Beadagon at the Bead Show in Marlborough, MA. She goes to other shows I know.  She has the BEST pearls and the most variety.  I just put random sizes on memory wire.  I have to say I want all kinds of these bracelets in different colors with different beads. They make up fast and are fun, fun, fun to wear.  I’m almost done with wedding crafts.  Think there is just one more.  The Rehearsal Dinner Favors.  I have to get started on my five per week Christmas cards.  I have put my box of “stuff” back in my craft room out of the closet.  (My husband didn’t even mention they were there.  Wasn’t that sweet!)

I do want to share with you faithful readers of my blog (all four of you) my son wrote my husband and I a lovely letter he gave us at the Rehearsal Dinner.  It even made my husband tear up.  We raised him up GOOD.  So proud and so happy he found someone to love and share his life with.

1 Comment »

Wedding

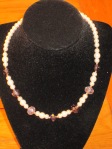
Here is the wedding necklace!!!  I know you have been waiting to see it.  Wedding week is over and the bride and groom are off on the honeymoon.

Everything went off really well.  It was a very moving wedding ceremony.  Their priest was excellent.  The reception was a fun, fun, party.  I think everyone had a good time.  I know I did.  There was a photo booth.  Let me just say – have one at your next party.  It was a big hit.  The DJ was excellent and my little “faux” granddaughter was introduced to the Chicken Dance and LOVED IT.

I will post other things later this week.  Thanks for your interest.


2 Comments »

IT’S BEEN A WHILE

Happy Labor Day Everyone!!!!

Lots to report.  We are in wedding mode here.  Trying to get the house ready so people do not think we are slobs (or one of the cast of Honey Boo Boo).  We have had several house problems.  It feels like the house is falling down around us and it’s only 12 years old.  First off, we had a leaky pipe.  It seems when my husband put some cabinets up for me in the laundry room and was trying to find a stud, he found the pipe and it felt like a stud.  Water has been dripping from the upstairs shower for like five years!!!  Can you imagine?  We thought it was the washer. lol

Then there was the septic problem.  We have septic here because we live, well because we live in New Hampshire.

Then, the final and worse problem was a window that evidently had been leaking around it since the house was built because they didn’t put flashing around it.  Well there was rotten wood and ANTS.  My husband hates the ANTS.

It’s all fixed now and we have to restore order.  Like that is ever gonna happen here.

This necklace is one of the ones I made on my weekend away.  (I need another one by the way!)  It was made with the pearls I had left from making my mother in law’s, which I will post soon.  I just love it.  It goes with so many things.

I have been wearing my “wedding” shoes around the house to break them in.  THEY HURT SO BAD!  There is no way I can wear them to the wedding.  Therefore, I have been online looking for new ones.  I have ordered two pairs. lol  I pray that at least one of them arrives prior to the wedding.  Anyone ever order from Zappos or DSW?

I have been stalking the Stamp TV site again.  Ms. Gina K suggests you make five Christmas cards per week starting this week and you will have enough and not be stressing out come December 1.  Just throwing that out there.  Oh and she has some really cute stamps she is selling on sale through today.  (They should pay me or give me a discount!)

One more thing…  If you love sunflowers, check out my friend, Mary’s, blog My Stamping Hideaway.  She took some beautiful pictures of a field of them.  She also has lovely cards she makes.

Check back for more adventures of the Honey McGuires!
3 Comments »